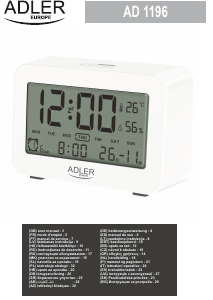
Návod Adler AD 1186 Rádiobudík

Potrebujete príručku pre svoj Adler AD 1186 Rádiobudík? Nižšie si môžete bezplatne prezrieť a stiahnuť príručku vo formáte PDF v slovenskom jazyku. Tento produkt má momentálne 3 často kladené otázky, 0 komentárov a má 1 hlas s priemerným hodnotením produktu 0/100. Ak toto nie je manuál, ktorý chcete, kontaktujte nás.

Je váš výrobok pokazený a nepodarilo sa vám problém odstrániť pomocou pokynov v návode? Prejdite na portál Repair Café, kde nájdete bezplatné servisné služby.

Návod

Loading…

4
Before connecting to the power supply ensure that the supply corresponds to the information on the rating label on the bottom of the
apparatus.
CLOCK
1. Connect the Mains Lead to the power supply.
2. Long press the SETTING – TIME (3) button, display HOUR will flash. Then you can press the UP (5) or DOWN (6) button to adjust the
hour.
3. After completing the hour setting. You short press the SETTING – TIME (3) button, display MINUTE will flash. Now you can press the UP
(5) or DOWN (6) button to adjust the minute.
4. Finally, you press the SETTING – TIME (3) button. The current time can be set.
DATE
1. Long press the SETTING – DATE (2) button, display YEAR will flash. Then you can
Press the UP (5) or DOWN (6) button to adjust the year.
2. After completing the year setting. You short press the SETTING – DATE (2) button, display MONTH will flash. Now you can press the UP
(5) or DOWN (6) button to adjust the month.
3. After completing the month setting. You short press the SETTING – DATE (2) button, display DAY will flash. Now you can press the UP
(5) or DOWN (6) button to adjust the day.
3. Finally, you press the SETTING – DATE (2) button. The current date can be set.
device (RCD) in the power circuit, with residual current rating not more than 30 mA. Contact
professional electrician in this matter.
15. Avoid getting the device wet.
16. The device may only be wiped with a dry cloth. Do not use water or cleaning fluids.
17. The device should be kept in a dry room.
1. SETTING – ALARM 2. SETTING – DATE 3. SETTING – TIME
4. SNOOZE / DIMMER 5. UP 6. DOWN
7. DATE 8. LED Display 9. Battery Compartment
10. Speaker 12. %RH- Humidity % 13. °C – Temperature inside
AC POWER OPERATION
4. You can short press the DATE (7) button to see the current date.
ALARM
1. Long press the SETTING – ALARM (1) button. Use the same procedures of setting the “CLOCK” to adjust your desired alarm time.
2. The alarm can be temporarily stopped for 9 minutes by pressing the SNOOZE / DIMMER (4) button. This can be repeated up to 5 times.
3. The alarm will switch off automatically after 120 minutes or can be canceled by pressing the SETTING – ALARM (1) button.
4. The alarm will be active again after 24 hours unless pressing the SETTING – ALARM (1) to turn off the alarm icon on the display.
SNOOZE
1. When the alarm is activated you can press the SNOOZE / DIMMER (4) button. It will pause the alarm for 9 minutes. After that, it will buzz
again.
DC9V (For backup)
Power Output: 3W
DIMMER
1. During normal operation and the alarm not ringing. You can press the SNOOZE / DIMMER (4) button to toggle between 2 display
brightness settings.
BATTERY BACK-UP
Inset a 9-volt battery (not included) in the compartment located in the back of the device (9); use preferably a long-life battery. In case of
temporary power failure, the battery will keep the time settings even if the display won't show.
Note: The effectiveness of this feature depends entirely on the freshness of your battery.
The circuit will not keep the right time if the battery is old or of poor quality.
CLEANING
Clean the body with a soft cloth moistened with water or mild detergent. Do not use solvents such as alcohol, benzene, or thinner, as they
may damage the cabinet finish. Make sure to disconnect the mains lead from the supply before cleaning. Please retain these
instructions for future reference.
SPECIFICATIONS
Power Source: 230V~50Hz
Stiahnuť návod v slovenčine (PDF, 3.15 MB)
(Myslite ekologicky a návod si vytlačte, len ak je to naozaj potrebné)

Loading…

Hodnotenie

Dajte nám vedieť svoj názor na Adler AD 1186 Rádiobudík a ohodnoťte výrobok. Chcete sa podeliť o svoje skúsenosti s týmto výrobkom alebo sa niečo spýtať? Napíšte komentár v spodnej časti stránky.
Ste spokojní s Adler AD 1186 Rádiobudík?
Áno Žiadny
0%
100%
1 hlas

Zapojte sa do diskusie o tomto výrobku

Tu sa môžete podeliť o to, čo si myslíte o Adler AD 1186 Rádiobudík. Ak máte otázku, najprv si pozorne prečítajte návod. Vyžiadanie manuálu je možné vykonať pomocou nášho kontaktného formulára.

Viac o tomto návode

Chápeme, že je pekné mať k svojmu Adler AD 1186 Rádiobudík papierovú príručku. Návod si môžete kedykoľvek stiahnuť z našej webovej stránky a vytlačiť si ho sami. Ak chcete mať originálnu príručku, odporúčame vám kontaktovať Adler. Mohli by byť schopní poskytnúť originálny návod. Hľadáte príručku k svojmu Adler AD 1186 Rádiobudík v inom jazyku? Vyberte si preferovaný jazyk na našej domovskej stránke a vyhľadajte číslo modelu, aby ste zistili, či ho máme k dispozícii.

Technické údaje

Značka Adler
Model AD 1186
Kategória Rádiobudíky
Typ súboru PDF
Veľkosť súboru 3.15 MB

Všetky príručky pre Adler Rádiobudíky
Ďalšie príručky od Rádiobudíky

Často kladené otázky o Adler AD 1186 Rádiobudík

Náš tím podpory vyhľadáva užitočné informácie o výrobkoch a odpovede na často kladené otázky. Ak nájdete v našich často kladených otázkach nejakú nezrovnalosť, dajte nám o tom vedieť pomocou nášho kontaktného formulára.

Čo znamená AM a PM? Overená

AM znamená Ante Meridiem a naznačuje, že je čas do poludnia. PM znamená Post Meridiem a naznačuje, že je čas po poludní.

Bolo to užitočné (294) Čítaj viac

Čo je GMT? Overená

GMT znamená greenwichský stredný čas (niekedy sa nazýva UTC, čo znamená koordinovaný svetový čas). Je čas na zemepisnú dĺžku 0, ktorá prechádza cez Greenwich neďaleko Londýna.

Bolo to užitočné (168) Čítaj viac

Aký je rozdiel medzi FM a AM? Overená

FM a AM sú obe formy modulácie používané na prenos signálu. FM znamená Frekvenčná modulácia a AM znamená Amplitude Modulation. AM je najstaršia forma modulácie. Najväčší rozdiel je v tom, že signál FM je oveľa silnejší ako signál AM.

Bolo to užitočné (167) Čítaj viac
Návod Adler AD 1186 Rádiobudík

Súvisiace produkty

Súvisiace kategórie

×
Download