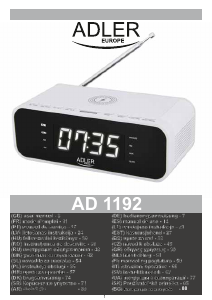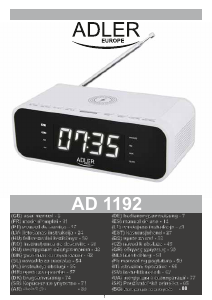
Návod Adler AD 1196 Rádiobudík

Potrebujete príručku pre svoj Adler AD 1196 Rádiobudík? Nižšie si môžete bezplatne prezrieť a stiahnuť príručku vo formáte PDF v slovenskom jazyku. Tento produkt má momentálne 3 často kladené otázky, 0 komentárov a má 0 hlasov. Ak toto nie je manuál, ktorý chcete, kontaktujte nás.

Je váš výrobok pokazený a nepodarilo sa vám problém odstrániť pomocou pokynov v návode? Prejdite na portál Repair Café, kde nájdete bezplatné servisné služby.

Návod

Loading…

ENGLISH
Alarm setting:
1. The device has 3 separate alarm settings.
2. Press the Up button (4) to choose desired alarm.
3. Press the Set button (3) once to edit the currently selected alarm.
4. By using the up button (4) and down button (5) set the currently edited value.
5. Press the Set button (3) to confirm the selection.
6. The order is as follows: Hour, minutes, and times per week.
7. The device has 3 turn-on options for the alarm.
a. 5: Monday till Friday
b. 6: Monday till Saturday
c. 7: Monday till Sunday.
Turning on the previously set alarm:
1. Set up the alarm as explained in the “Alarm Setting” part of the manual.
2. Choose the desired alarm by pressing the Up button (4).
3. Press the Down button (5) to turn the desired alarm on or off. The display will show a clock with the corresponding number inside (1,2,3).
Technical details:
Power supply: Battery 2x AAA (Lr03) 3V
SAFETY CONDITIONS IMPORTANT SAFETY INSTRUCTIONS READ CAREFULLY AND KEEP FOR FUTURE REFERENCE
Warranty conditions vary when the device is used for commercial purposes.
1. Before using the product, please read carefully and always follow the instructions below. The manufacturer is not responsible for any
damage caused by improper use.
2. The product may only be used indoors. Do not use the product for purposes inconsistent with its intended use.
3. Supply voltage: 3V (2 AAA 1.5V batteries.)
4. Be careful when using the appliance with children. Do not let children play with the product. Do not let children or people unfamiliar
with the device use it unsupervised.
5. WARNING: This device may be used by children over 8 years of age and people with reduced physical, sensory or mental abilities
or persons with no experience or knowledge of the device, only under the supervision of a person responsible for their safety, or if they
have been instructed on safe use device and are aware of the risks associated with its operation. Children should not play with the
device. Cleaning and maintenance of the device should not be performed by children unless they are 8 years of age or older and these
activities are performed under supervision.
6. Never put the device into water. Never expose the product to weather conditions such as direct sunlight or rain, etc. Never use the
product in wet conditions.
7. Never place the product on or near hot or warm surfaces or kitchen appliances such as an electric oven or gas burner.
8. Never use the product near flammable materials.
9. The device may only be wiped with a dry cloth. Do not use water or cleaning fluids.
10. Store the device in a dry room.
Device description Alarm clock:
1. Display 2. SNZ / Light button 3. Set button 4. Up button 5. Down button. 6. Battery compartment
Setting up the device:
1. Remove all packing material.
2. Open the battery compartment.
3. Make sure the polarization on the battery and the battery slot is correct. – to – and + to +. Insert the needed batteries.
Button Description:
2. SNZ / Light button – Turn on the backlight of the main display. When the alarm starts, turn on the snooze function.
3. Set button – Enter settings of alarm, time, and date.
4. Up button – Add to the current set option. Switch between alarm settings.
4. When the alarm goes off, press the SNZ / Light button (2) for 3 seconds. The alarm will turn off.
3. Press the up button (4) and down button (5) to set the desired then confirm by pressing the Set button (3) once. The order is Year, Month, Day, 24 or 12H time format, Hour, and Minutes.
2. Press and hold the Set button (3). The display will begin to flash.
1. Turn on the device by inserting the batteries.
Time and date setting:
5. Down button – Lowe the current set option. Turn off the currently selected alarm.
Please transfer cardboard packaging to waste paper. Pour the polyethylene bags (PE) into the plastic container
Worn device should be returned to the appropriate point storage because it is dangerous in the device
ingredients may pose a threat to the environment. The electrical device should be handed over to limit
its reuse and use. If in the device there are batteries you have to take out and give to the point stored separately.
Stiahnuť návod v slovenčine (PDF, 4.38 MB)
(Myslite ekologicky a návod si vytlačte, len ak je to naozaj potrebné)

Loading…

Hodnotenie

Dajte nám vedieť svoj názor na Adler AD 1196 Rádiobudík a ohodnoťte výrobok. Chcete sa podeliť o svoje skúsenosti s týmto výrobkom alebo sa niečo spýtať? Napíšte komentár v spodnej časti stránky.
Ste spokojní s Adler AD 1196 Rádiobudík?
Áno Žiadny
Ohodnoťte výrobok ako prvý
0 hlasy

Zapojte sa do diskusie o tomto výrobku

Tu sa môžete podeliť o to, čo si myslíte o Adler AD 1196 Rádiobudík. Ak máte otázku, najprv si pozorne prečítajte návod. Vyžiadanie manuálu je možné vykonať pomocou nášho kontaktného formulára.

Viac o tomto návode

Chápeme, že je pekné mať k svojmu Adler AD 1196 Rádiobudík papierovú príručku. Návod si môžete kedykoľvek stiahnuť z našej webovej stránky a vytlačiť si ho sami. Ak chcete mať originálnu príručku, odporúčame vám kontaktovať Adler. Mohli by byť schopní poskytnúť originálny návod. Hľadáte príručku k svojmu Adler AD 1196 Rádiobudík v inom jazyku? Vyberte si preferovaný jazyk na našej domovskej stránke a vyhľadajte číslo modelu, aby ste zistili, či ho máme k dispozícii.

Technické údaje

Značka Adler
Model AD 1196
Kategória Rádiobudíky
Typ súboru PDF
Veľkosť súboru 4.38 MB

Všetky príručky pre Adler Rádiobudíky
Ďalšie príručky od Rádiobudíky

Často kladené otázky o Adler AD 1196 Rádiobudík

Náš tím podpory vyhľadáva užitočné informácie o výrobkoch a odpovede na často kladené otázky. Ak nájdete v našich často kladených otázkach nejakú nezrovnalosť, dajte nám o tom vedieť pomocou nášho kontaktného formulára.

Čo znamená AM a PM? Overená

AM znamená Ante Meridiem a naznačuje, že je čas do poludnia. PM znamená Post Meridiem a naznačuje, že je čas po poludní.

Bolo to užitočné (294) Čítaj viac

Čo je GMT? Overená

GMT znamená greenwichský stredný čas (niekedy sa nazýva UTC, čo znamená koordinovaný svetový čas). Je čas na zemepisnú dĺžku 0, ktorá prechádza cez Greenwich neďaleko Londýna.

Bolo to užitočné (168) Čítaj viac

Aký je rozdiel medzi FM a AM? Overená

FM a AM sú obe formy modulácie používané na prenos signálu. FM znamená Frekvenčná modulácia a AM znamená Amplitude Modulation. AM je najstaršia forma modulácie. Najväčší rozdiel je v tom, že signál FM je oveľa silnejší ako signál AM.

Bolo to užitočné (167) Čítaj viac
Návod Adler AD 1196 Rádiobudík

Súvisiace produkty

Súvisiace kategórie

×
Download