Návod Bosch GLI 18V-2200 C Svietidlo

Potrebujete príručku pre svoj Bosch GLI 18V-2200 C Svietidlo? Nižšie si môžete bezplatne prezrieť a stiahnuť príručku vo formáte PDF v slovenskom jazyku. Tento produkt má momentálne 7 často kladené otázky, 0 komentárov a má 0 hlasov. Ak toto nie je manuál, ktorý chcete, kontaktujte nás.

Je váš výrobok pokazený a nepodarilo sa vám problém odstrániť pomocou pokynov v návode? Prejdite na portál Repair Café, kde nájdete bezplatné servisné služby.

Návod

Loading…

12 | English
Assembly
Battery Charging (seefigureB)
Note: The battery is supplied partially charged. To ensure
full battery capacity, fully charge the battery in the charger
before using your tool for the first time.
The lithium-ion battery can be charged at any time without
reducing its service life. Interrupting the charging process
does not damage the battery.
The lithium-ion battery is protected against deep discharge
by the Electronic Cell Protection (ECP). A protective circuit
switches the cordless worklight off when the battery is
drained.
u Do not continue to press the on/off switch after the
worklight has been automatically switched off. This
can damage the battery. Ensure that the battery is
charged and that the cordless worklight has cooled down
before switching the cordless worklight on again.
To remove the battery(14), press the release button(13)
and pull the battery out of the cordless worklight. Do not use
force to do this.
Follow the instructions on correct disposal.
Putting the Button Cell into Operation
(seefigureB)
Remove the separating film between the button cell(11)
and the button cell contact when using the tool for the first
time.
The cordless worklight is fitted with a button cell so that it
can be detected by the mobile device even if no battery(14)
is inserted.
Unlock the locking mechanism of the battery cover(2) and
fold up the battery cover(3).
Unscrew the screw of the battery compartment cover(9)
and remove the battery compartment cover(10).
Remove the film from the button cell contact and reattach
the battery compartment cover with the screw.
Operation
Start-up
Inserting the Battery
Unlock the locking mechanism of the battery cover (2) and
fold up the battery cover (3).
Insert the charged battery (14) into the lamp head (4) until
you feel it engage and it is flush with the lamp head (4).
Close the battery cover (3) and then the locking mechanism
of the battery cover (2).
u Make sure that the rubber lip is seated correctly when
closing the battery cover. Otherwise protection against
dust and splash water will not be ensured.
Setting up
Carefully fold out the stand(5) and place the cordless work-
light on the floor. Make sure it is secure.
Fastening to the tripod
You can use the tripod mount (7) to screw the cordless
worklight onto a tripod.
Tighten the 5/8" screw. Ensure that the tripod has a firm
footing.
Swivelling the Lamp Head (see figure A)
The lamp head (4) is attached to the carrying handle (8).
The lamp head can be set to five different positions using the
carrying handle.
Switching On/Off
To start up the cordless worklight, press the on/off switch
(1).
To switch off the cordless worklight, press the on/off switch
(1) again.
Adjusting the Brightness
Press the on/off switch (1) briefly to switch on the cordless
worklight with maximum brightness. To adjust the bright-
ness in two stages, hold down the on/off switch (1) until the
required brightness is reached.
Temperature-dependent overload protection
When the permitted operating temperature is exceeded, the
cordless worklight initially reduces the brightness before
switching itself off if required for protection. Let the cordless
worklight cool down and then switch the cordless worklight
back on.
Changing the Button Cell (seefigureB)
u Make sure that the battery compartment(12) is not
damaged when removing the cell.
u Make sure that the positive pole of the button cell
faces upwards.
A warning will be displayed in the app before the button
cell(11) is fully used up.
To change the button cell(11), unlock the locking mechan-
ism of the battery cover(2) and fold up the battery
cover(3).
Unscrew the screw of the battery compartment cover(9)
and remove the battery compartment cover(10).
Remove the empty button cell and insert a new button cell.
Reattach the battery compartment cover with the screw.
Battery charge indicator
The green LEDs on the battery charge indicator indicate the
state of charge of the battery. For safety reasons, it is only
possible to check the state of charge when the power tool is
not in operation.
Press the button for the battery charge indicator or to
show the state of charge. This is also possible when the bat-
tery is removed.
If no LED lights up after pressing the button for the battery
charge indicator, then the battery is defective and must be
replaced.
1 609 92A 634 | (11.11.2020) Bosch Power Tools
Stiahnuť návod v slovenčine (PDF, 3.84 MB)
(Myslite ekologicky a návod si vytlačte, len ak je to naozaj potrebné)

Loading…

Hodnotenie

Dajte nám vedieť svoj názor na Bosch GLI 18V-2200 C Svietidlo a ohodnoťte výrobok. Chcete sa podeliť o svoje skúsenosti s týmto výrobkom alebo sa niečo spýtať? Napíšte komentár v spodnej časti stránky.
Ste spokojní s Bosch GLI 18V-2200 C Svietidlo?
Áno Žiadny
Ohodnoťte výrobok ako prvý
0 hlasy

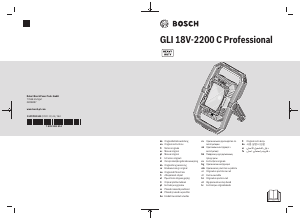
Zapojte sa do diskusie o tomto výrobku

Tu sa môžete podeliť o to, čo si myslíte o Bosch GLI 18V-2200 C Svietidlo. Ak máte otázku, najprv si pozorne prečítajte návod. Vyžiadanie manuálu je možné vykonať pomocou nášho kontaktného formulára.

Viac o tomto návode

Chápeme, že je pekné mať k svojmu Bosch GLI 18V-2200 C Svietidlo papierovú príručku. Návod si môžete kedykoľvek stiahnuť z našej webovej stránky a vytlačiť si ho sami. Ak chcete mať originálnu príručku, odporúčame vám kontaktovať Bosch. Mohli by byť schopní poskytnúť originálny návod. Hľadáte príručku k svojmu Bosch GLI 18V-2200 C Svietidlo v inom jazyku? Vyberte si preferovaný jazyk na našej domovskej stránke a vyhľadajte číslo modelu, aby ste zistili, či ho máme k dispozícii.

Technické údaje

Značka Bosch
Model GLI 18V-2200 C
Kategória Svietidlá
Typ súboru PDF
Veľkosť súboru 3.84 MB

Všetky príručky pre Bosch Svietidlá
Ďalšie príručky od Svietidlá

Často kladené otázky o Bosch GLI 18V-2200 C Svietidlo

Náš tím podpory vyhľadáva užitočné informácie o výrobkoch a odpovede na často kladené otázky. Ak nájdete v našich často kladených otázkach nejakú nezrovnalosť, dajte nám o tom vedieť pomocou nášho kontaktného formulára.

Je všetko LED osvetlenie stmievateľné? Overená

Nie, nie všetky LED svetlá sú stmievateľné. Toto je uvedené na obale alebo na samotnom svetle.

Bolo to užitočné (493) Čítaj viac

Vložil som do lampy nové svetlo, ale nerozsvieti sa, prečo je to tak? Overená

Niektoré žiarovky sú vyrobené pre svetelné zdroje s konkrétnym príkonom. Ak je vložený svetelný zdroj, ktorý vyžaduje vyšší príkon, ako dokáže poskytnúť lampa, svetlo sa nemusí rozsvietiť. Ak žiarovka poskytuje oveľa vyšší príkon, než na aký je určený svetelný zdroj, môže sa spáliť.

Bolo to užitočné (351) Čítaj viac

Prečo je dôležitá farba svetla? Overená

Všeobecne existujú dva druhy svetla, teplé svetlo a studené svetlo. Studené svetlo vás udrží v ostrosti a bdelosti. Teplé svetlo pôsobí relaxačne. Teplo svetla sa meria v Kelvinoch a je uvedené na obale samotnej žiarovky.

Bolo to užitočné (285) Čítaj viac

Čo je to lúmen? Overená

Lumen je merná jednotka celkového množstva viditeľného svetla emitovaného zdrojom.

Bolo to užitočné (228) Čítaj viac

Aké skrutkovacie základne existujú? Overená

Na celom svete existuje veľa druhov zásuviek, ale najpoužívanejšie sú objímky založené na Edisonovej skrutke, označené písmenom E. Vo väčšine krajín sú základne skrutiek E27 a E14 štandardné. V Spojených štátoch sú štandardom E26, E17, E12 a E10.

Bolo to užitočné (172) Čítaj viac

Čo hovoria watty na moju lampu? Overená

Watt je jednotka merania spotreby elektrickej energie. Žiarovky, ktoré produkujú viac svetla, zvyčajne spotrebujú viac wattu, ale na porovnanie svetelného výkonu by ste mali vždy použiť lúmen.

Bolo to užitočné (149) Čítaj viac

Čo je to LED? Overená

LED znamená Light-Emitting Diode. Prietokom energie cez polovodič v správnom smere je emitované svetlo.

Bolo to užitočné (129) Čítaj viac
Návod Bosch GLI 18V-2200 C Svietidlo

Súvisiace produkty

Súvisiace kategórie