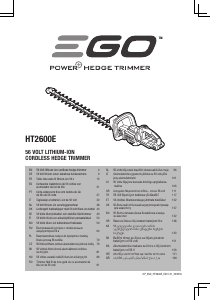
Návod EGO HT2600E Plotové nožnice

Potrebujete príručku pre svoj EGO HT2600E Plotové nožnice? Nižšie si môžete bezplatne prezrieť a stiahnuť príručku vo formáte PDF v slovenskom jazyku. Tento produkt má momentálne 4 často kladené otázky, 0 komentárov a má 0 hlasov. Ak toto nie je manuál, ktorý chcete, kontaktujte nás.

Je váš výrobok pokazený a nepodarilo sa vám problém odstrániť pomocou pokynov v návode? Prejdite na portál Repair Café, kde nájdete bezplatné servisné služby.

Návod

Loading…

56 VOLT LITHIUM-ION CORDLESS HEDGE TRIMMER— HT2600E6
EN
To Stop
Move the hedge trimmer away from the cutting area and
release either of the trigger to stop the hedge trimmer.
WARNING: Always remove the battery pack from
the hedge trimmer during work breaks and after finishing
work.
USING THE HEDGE TRIMMER
DANGER: If the blade jams on any electrical cord
or line, DO NOT TOUCH THE BLADE! IT CAN BECOME
ELECTRICALLY LIVE AND VERY DANGEROUS. Continue
to hold the hedge trimmer by the insulated rear handle
or lay it down and away from you in a safe manner.
Disconnect the electrical service to the damaged line or
cord before attempting to free the blade from the line or
cord. Failure to heed this warning will result in serious
personal injury or possible death.
WARNING: Avoid trimming too much at one time or
through the heavy shrubbery. This can cause the blades to
bind and slow, reducing the cutting efficiency.
NOTICE: The trimmer shall be used to cut stems less
than (30.5mm) thick.
NOTICE: For new growth, a wide sweeping is suitable
for the stems fed directly into the cutting blade. For older
growth, a sawing movement is good for trimming the
thicker stems. A non-powered hand saw or pruning saw is
suggested for trimming the large stems first.
Top Cutting
Use a wide sweeping motion. A slight downward tilt of the
cutting blades in the direction of motion gives the best
cutting results. For better cutting effect, you might as well
use the string to guide the hedge level as Fig. E shown.
Side Cutting
When trimming the sides of the hedge, begin at the
bottom and cut upwards as Fig. F shown. Trim the side of
a hedge so that it will be slightly narrower at the top. This
shape will expose more of the hedge to sunlight, resulting
in a more uniform growth.
MAINTENANCE
WARNING: When servicing, use only identical
replacement parts. Use of any other parts may create a
hazard or cause product damage. To ensure safety and
reliability, all repairs should be performed by a qualified
service technician.
APPLICATION
You may use this product for trimming the hedges,
shrubs and bushes with a branch diameter of less than
ø30.5mm.
NOTICE: The tool is to be used only for its prescribed
purpose. Any other use is deemed to be a case of misuse.
INSTALLING/REMOVING THE BATTERY PACK
Use only with battery packs and chargers listed
in fig.A2.
Charge before first use.
To Install (Fig. B)
Align the battery ribs with the mounting slots and press
the battery pack down until you hear a “click”.
To Remove (Fig. C)
Depress the battery-release button and pull the battery
pack out.
WARNING: Always be aware for the location of your
feet, children, or pets when pressing the battery-release
button. Serious injury could result if the battery pack falls.
NEVER remove the battery pack at a high location.
HOLDING THE HEDGE TRIMMER (Fig. D1-D5)
The unit has both a front and rear handle. With the blade
directed away from you, hold the unit by both handles.
The rear handle can be set in five positions
(0°/±45°/±90°) by raising up the handle-release lever
(Fig. D1 to Fig.D5), giving you many choices for a
comfortable grip when performing cutting operations.
WARNING: Do not adjust the handle while the tool is
running. Stop the tool and remove the battery first.
STARTING/STOPPING THE HEDGE TRIMMER
Before operating, remove the blade guard and hold the
trimmer with both hands, one hand on the rear handle
and the other on the front handle. Then check for stable
footing, upright standing and a proper cutting distance.
To Start
1. Install the battery pack.
2. Squeeze and hold the front trigger with one hand.
3. Press and hold the lock-off button with the thumb of
your other hand, then squeeze the rear trigger with
your fingers to start the hedge trimmer. Release the
lock-off button but continue to squeeze the trigger for
continued operation.
Stiahnuť návod v slovenčine (PDF, 36.33 MB)
(Myslite ekologicky a návod si vytlačte, len ak je to naozaj potrebné)

Loading…

Hodnotenie

Dajte nám vedieť svoj názor na EGO HT2600E Plotové nožnice a ohodnoťte výrobok. Chcete sa podeliť o svoje skúsenosti s týmto výrobkom alebo sa niečo spýtať? Napíšte komentár v spodnej časti stránky.
Ste spokojní s EGO HT2600E Plotové nožnice?
Áno Žiadny
Ohodnoťte výrobok ako prvý
0 hlasy

Zapojte sa do diskusie o tomto výrobku

Tu sa môžete podeliť o to, čo si myslíte o EGO HT2600E Plotové nožnice. Ak máte otázku, najprv si pozorne prečítajte návod. Vyžiadanie manuálu je možné vykonať pomocou nášho kontaktného formulára.

Viac o tomto návode

Chápeme, že je pekné mať k svojmu EGO HT2600E Plotové nožnice papierovú príručku. Návod si môžete kedykoľvek stiahnuť z našej webovej stránky a vytlačiť si ho sami. Ak chcete mať originálnu príručku, odporúčame vám kontaktovať EGO. Mohli by byť schopní poskytnúť originálny návod. Hľadáte príručku k svojmu EGO HT2600E Plotové nožnice v inom jazyku? Vyberte si preferovaný jazyk na našej domovskej stránke a vyhľadajte číslo modelu, aby ste zistili, či ho máme k dispozícii.

Technické údaje

Značka EGO
Model HT2600E
Kategória Plotové nožnice
Typ súboru PDF
Veľkosť súboru 36.33 MB

Všetky príručky pre EGO Plotové nožnice
Ďalšie príručky od Plotové nožnice

Často kladené otázky o EGO HT2600E Plotové nožnice

Náš tím podpory vyhľadáva užitočné informácie o výrobkoch a odpovede na často kladené otázky. Ak nájdete v našich často kladených otázkach nejakú nezrovnalosť, dajte nám o tom vedieť pomocou nášho kontaktného formulára.

Ako zistím, že je môj strihač živých plotov tupý? Overená

Keď sa namiesto strihania ťahajú konáre, plotostrih je tupý a treba ho nabrúsiť.

Bolo to užitočné (290) Čítaj viac

Ako nabrúsim čepele nožníc na živý plot? Overená

Naostrenie nožov nožníc na živý plot je dôležité pre zachovanie výkonu a účinnosti nástroja. Na brúsenie čepelí budete potrebovať pilník alebo brúsny kameň špeciálne navrhnutý pre typ čepele vašej nožnice na živý plot.

Bolo to užitočné (196) Čítaj viac

Ako mám namazať čepele nožníc na živý plot? Overená

Mazanie čepelí nožníc na živý plot pomôže znížiť trenie a opotrebovanie, čím sa predĺži životnosť nástroja. Použite vysokokvalitný mazací olej špeciálne navrhnutý pre nožnice na živé ploty a po každom použití naneste malé množstvo na čepele.

Bolo to užitočné (91) Čítaj viac

Ako môžem zabrániť tvorbe hrdze na mojich nožoch na živé ploty? Overená

Hrdza môže spôsobiť poškodenie čepelí nožníc na živé ploty, čím sa zníži ich výkon a životnosť. Aby ste predišli hrdzi, čepele po každom použití dôkladne očistite a vysušte a uložte ich na suchom a čistom mieste. Môžete tiež zvážiť nanesenie ochranného náteru, ako je olej alebo inhibítor hrdze, na čepele pred ich uskladnením.

Bolo to užitočné (55) Čítaj viac
Návod EGO HT2600E Plotové nožnice

Súvisiace produkty

Súvisiace kategórie