EN
Instruction manual
NL
Gebruiksaanwijzing
FR
Mode d’emploi
DE Bedienungsanleitung
ES Manual de usuario
PT Manual de utilizador
IT Manuale utente
SV Bruksanvisning
CS Návod na použití
PL Instrukcja obsługi
SK Návod na použitie
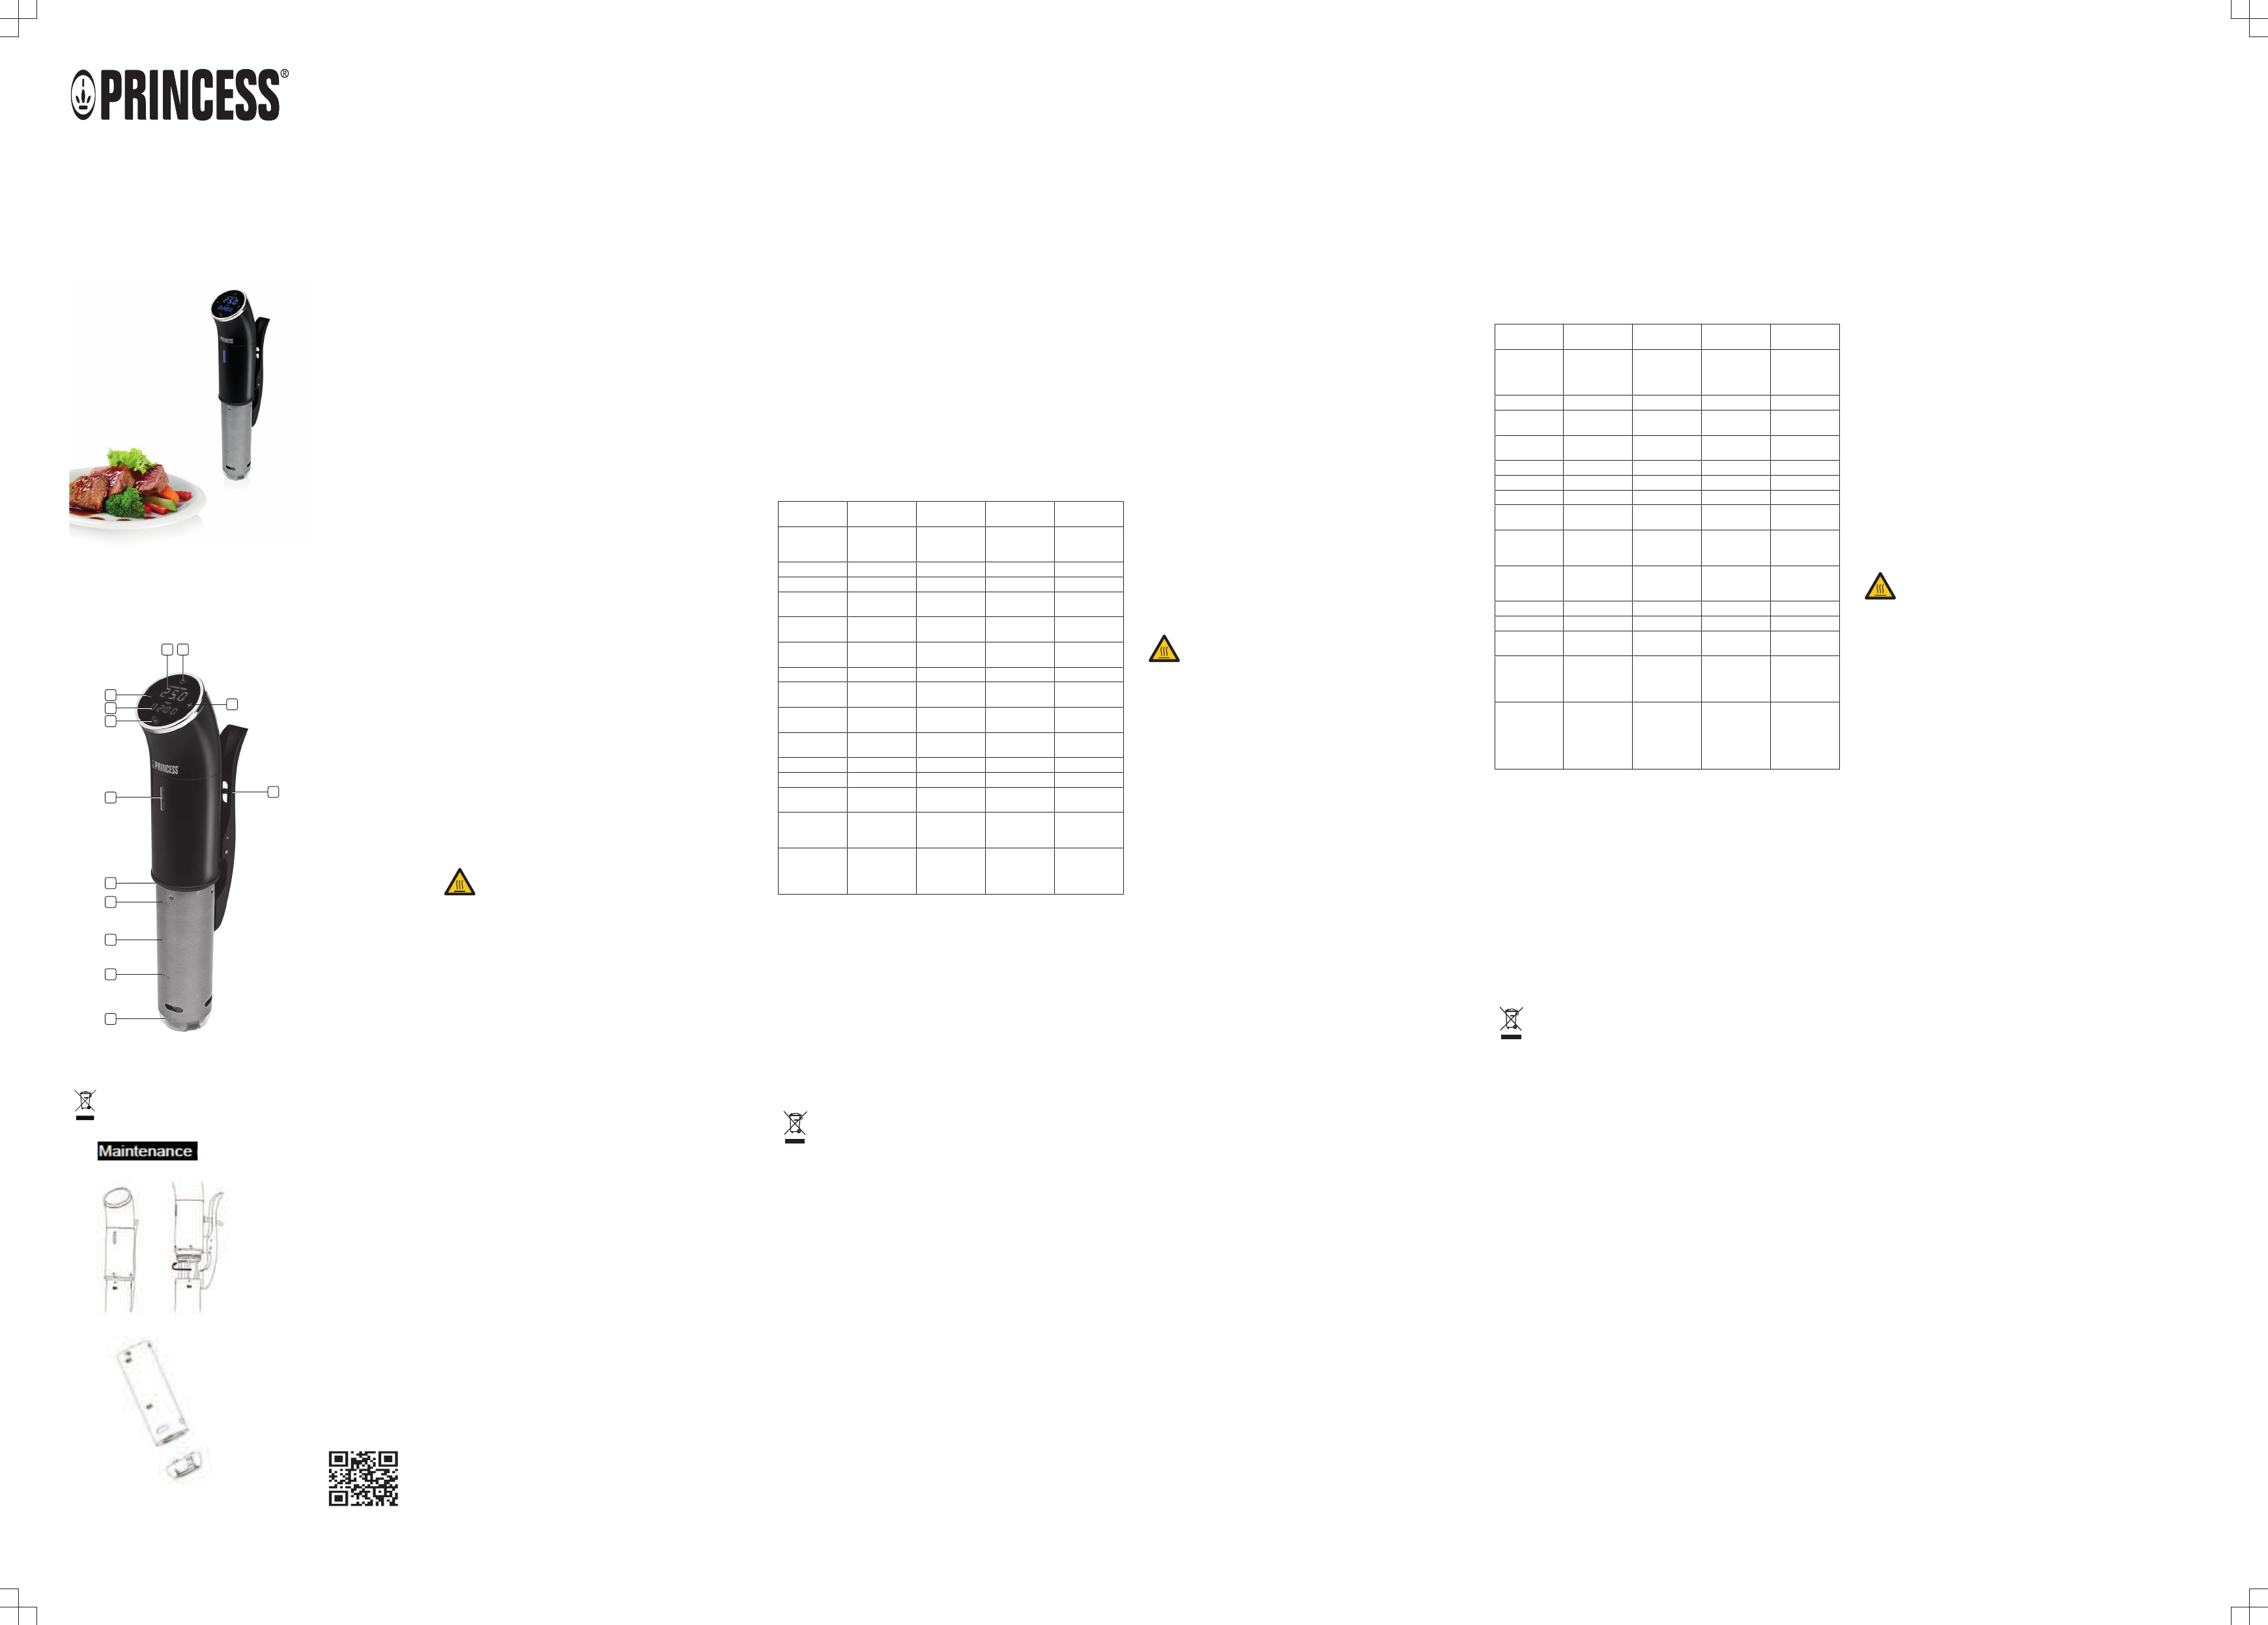
Water-proof Sous Vide Stick
01.267003.01.001
RU Руководство по эксплуатации
10
12
3
4
8
9
12
13
11
5
6
7
PARTS DESCRIPTION / ONDERDELENBESCHRIJVING / DESCRIPTION DES PIÈCES /
TEILEBESCHREIBUNG / DESCRIPCIÓN DE LAS PIEZAS / DESCRIÇÃO DOS
COMPONENTES / DESCRIZIONE DELLE PARTI / BESKRIVNING AV DELAR /
OPIS CZĘŚCI / POPIS SOUČÁSTÍ / POPIS SÚČASTÍ / ОПИСАНИЕ ЗАПЧАСТИ
www.princesshome.eu
© Princess 2018
[WEEE Logo]
ENInstruction manual
SAFETY
• By ignoring the safety instructions the
manufacturer can not be hold responsible for
the damage.
• If the supply cord is damaged, it must be
replaced by the manufacturer, its service
agent or similarly qualified persons in order to
avoid a hazard.
• Never move the appliance by pulling the cord
and make sure the cord can not become
entangled.
• The appliance must be placed on a stable,
level surface.
• The user must not leave the device
unattended while it is connected to the supply.
• This appliance is only to be used for
household purposes and only for the purpose
it is made for.
• This appliance shall not be used by children
aged less than 8 years. This appliance can be
used by children aged from 8 years and above
and persons with reduced physical, sensory or
mental capabilities or lack of experience and
knowledge if they have been given
supervision or instruction concerning use of
the appliance in a safe way and understand
the hazards involved. Children shall not play
with the appliance. Keep the appliance and its
cord out of reach of children aged less than 8
years. Cleaning and user maintenance shall
not be made by children unless older than 8
and supervised.
• To protect yourself against an electric shock,
do not immerse the cord, plug or appliance in
the water or any other liquid.
• This appliance is intended to be used in
household and similar applications such as:
– Staff kitchen areas in shops, offices and other working environments.
– By clients in hotels, motels and other residential type environments.
– Bed and breakfast type environments.
– Farm houses.
• Children shall not play with the appliance.
• This appliance shall not be used by children.
Keep the appliance and its cord out of reach
of children.
• To protect yourself against an electric shock,
do not immerse the cord, plug or appliance in
the water or any other liquid.
• Surface are liable to get hot during use.
• Only use the appliance with the appropriate
connector.
• The connector must be removed before the
appliance will be cleaned, please make sure
the inlet is completely dry before the unit will
be used again.
• WARNING: Position the lid so that steam is
directed away from the handle.
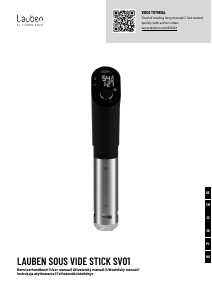
PARTS DESCRIPTION
1. On / Off touch button
2. Current temperature display
3. Timer display
4. Temperature / Timer setting button
5. Touch button -
6. Touch button +
7. Handle clamp
8. Power light
9. Stainless steel body
10. Safety screw
11. Maximum water level
12. Minimum water level
13. Water pump cap
BEFORE THE FIRST USE
• Take the appliance andaccessoriesoutthebox.Removethe
stickers,protective foilorplasticfrom thedevice.
• Before using your appliance for the first time, wipe off all removable
parts with a damp cloth. Never use abrasive products.
• When the device is turned on for the first time, a slight odour will
occur. This is normal, ensure adequate ventilation. This fragrance is
only temporary and will disappear soon.
USE
• Lock the appliance on a heat-resistant container with the handle
clamp. Place the container on an even, stable and heat resistance
surface.
• Fill in the container with water. The water level should be between
“Min” and “Max” water level. Make sure the water level is within the
acceptable water level after added the food pounces to the container
because the water level will rise
• Note: As the water temperature rises, the water begin to evaporate. If
the water level goes below the “Min” water level, the appliance will
have alarm sound and shut off automatically.
• Press the On / Off button to set the current temperature and the timer.
The temperature digital led and the timer digital led are flashing
together.
• Use the temperature / timer button to set the temperature. The
temperature LED flashes, briefly press + or - to increase / decrease
the temperature by 0.5 °C, press and hold the + and - buttons to
increase / decrease the temperature by 5°C. The maximum set
temperature is 95°C, minimum temperature is 25°C.
• Press the temperature / timer button again to set the timer function.
The timer minute LED will flash, briefly press + or - to increase /
decrease the time with 1 minute, press and hold the + / - button to
increase / decrease the time with 5 minutes. The maximum minutes
setting is 59, the minimum is 0.
• When pressing the temperature / timer button once again to let the hour
LED flash. Briefly press + / - to increase / decrease with 1 hour, press
and hold the + / - button to increase / decrease the time with 10 hours.
The maximum is 99 hours, the minimum is 0.
• Press the On / Off button to confirm the setting and the device will start
working. When the setting temperature is reached the device will beep
three times and enter a state of keeping the stable temperature.
• To change the settings, press and hold the power button for 2 seconds
and repeat the setting of the device. The appliance stops automatically
when the set time has elapsed and the standby mode will then be
activated.
• If the device is in standby mode, Press the On / Off button 2 seconds,
the unit will switch off.
• When the water level is lower than the "Min" mark or the appliance is
lifted during use, the temperature LED shows "Err" and the device beeps.
The device switches off automatically after 30 seconds or press the On /
Off button to restart the device.
• When the desired settings are complete, the temperature LED shows
"End" and the device will beep 6 times. "End" will continuously display
until the unit is switched off or be restarted.
• The SousVide method pasteurises the food at exact temperatures, to
preserve your food. After pasteurising, cool down the bag in ice water
and store it in the fridge at less than 7°C, freeze or eat immediately.
Pasteurisation takes place at a core temperature of about 62°C. The
recommended cook temperatures for food are between 55°C and 65°C.
There is a tolerance of plus 1°C if temperatures are set till 65°C, and plus
2 to 3°C by temperature over 70°C. This tolerance needs to be taken into
consideration while temperatures are set (e.g. set 72°C if 75°C are
desired).
• Only use bags which are suitable for vacuum packing. There is no
guarantee of proper closure if normal bags are used.
• The cooking time depends on the thickness of the food. Times can also
vary due to the quantity and consistency of the food. The following time
settings are only guidelines and can be adapted to your taste. Double the
time for tough meat and extend the time by at least 20% for deep-frozen
food.
• The temperatures listed in the tables must not be exceeded!
Meat Thickness of
the food
Temperature
°C
Min. Time Max. time
Tender Cuts
(Ribeye, T-
Bone, etc.)
25mm 56,5+ 1 hour 4 hours
Spare Ribs 50mm 56,5+ 24 hours 48-72 hours
Roast Pork 40mm 71-80 12 hours 30 hours
Poultry Thickness of
the food
Temperature
°C
Min. Time Max. time
Chicken
Breast
25mm 63,5+ 1 hour 2-4 hours
Turkey
Breast
50mm 63,5+ 2.5 hours 4-6 hours
Duck Breast 25mm 56,5+ 1.5 hours 4-6 hours
Chicken leg
or thigh
25mm 74-80 4 hours 6-8 hours
Seafood Thickness of
the food
Temperature
°C
Min. Time Max. time
Fish
(medium)
12.5-25mm 60 20 minutes 30 minutes
Lobster 25mm 60 45 minutes 60 minutes
Shrimp Jumbo 60 30 minutes 40 minutes
Vegetables Thickness of
the food
Temperature
°C
Min. Time Max. time
Root
(Carrots,
potatoes etc.)
up to 25mm 84 1-2 hours 4 hours
Tender
(Asparagus,
peas, broccoli
etc.)
up to 25mm 84 30 minutes 1.5 hours
CLEANING AND MAINTENANCE
• Before cleaning, unplug the appliance and wait for the appliance to cool
down.
• Wipe the inside and the edges of the appliance with a paper towel or a
soft cloth.
• Do not clean the inside or outside with any abrasive scouring pad or
steel wool as this will damage the finish.
• Twist off the safety screw if maintenance is needed.
• Hold the unit and rotate the stainless steel body in clockwise direction to
take it off.
• Turn the pump cap out of the lock position then pull it off.
• The stainless steel body and water pump cap are dishwasher proof.
• Use dish soap and a soft brush to clean the heating coil, pump shaft and
sensors. Rinse clean under water.
• Do not rinse the top part of the circulator including the main body in
water. The main body is not dishwasher proof.
• There can be some noise: under normal operation the system will hum
due to the motor, impeller and cooling fan in operation.
ENVIRONMENT
This appliance should not be put into the domestic garbage at the
end of its durability, but must be offered at a central point for the recycling
of electric and electronic domestic appliances. This symbol on the
appliance, instruction manual and packaging puts your attention to this
important issue. The materials used in this appliance can be recycled. By
recycling of used domestic appliances you contribute an important push to
the protection of our environment. Ask your local authorities for information
regarding the point of recollection.
Support
You can find all available information and spare parts at
www.princesshome.eu!
NLGebruiksaanwijzing
VEILIGHEID
• De fabrikant is niet aansprakelijk voor schade
voortvloeiend uit het niet opvolgen van de
veiligheidsinstructies.
• Als het netsnoer beschadigd is, moet het
worden vervangen door de fabrikant, de
onderhoudsmonteur van de fabrikant of door
personen met een soortgelijke kwalificatie om
gevaar te voorkomen.
• Verplaats het apparaat nooit door aan het snoer
te trekken. Zorg ervoor dat het snoer nergens in
verstrikt kan raken.
• Het apparaat moet op een stabiele, vlakke
ondergrond worden geplaatst.
• De gebruiker mag het apparaat niet onbeheerd
achterlaten wanneer de stekker zich in het
stopcontact bevindt.
• Dit apparaat is uitsluitend voor huishoudelijk
gebruik en voor het doel waar het voor bestemd
is.
• Dit apparaat mag niet worden gebruikt door
kinderen jonger dan 8 jaar. Dit apparaat kan
worden gebruikt door kinderen vanaf 8 jaar en
door personen met verminderde lichamelijke,
zintuiglijke of geestelijke vermogens of gebrek
aan de benodigde ervaring en kennis indien ze
onder toezicht staan of instructies krijgen over
hoe het apparaat op een veilige manier kan
worden gebruikt alsook de gevaren begrijpen
die met het gebruik samenhangen. Kinderen
mogen niet met het apparaat spelen. Houd het
apparaat en het netsnoer buiten bereik van
kinderen jonger dan 8 jaar. Laat reiniging en
onderhoud niet door kinderen uitvoeren, tenzij
ze ouder zijn dan 8 jaar en onder toezicht staan.
• Dompel het snoer, de stekker of het apparaat
niet onder in water of andere vloeistoffen om
elektrische schokken te voorkomen.
• Dit apparaat is bedoeld voor huishoudelijk en
soortgelijk gebruik, zoals:
– Personeelskeukens in winkels, kantoren en andere werkomgevingen.
– Door gasten in hotels, motels en andere residentiële omgevingen.
– Bed&Breakfast-type omgevingen.
– Boerderijen.
• Kinderen mogen niet met het apparaat spelen.
• Dit apparaat mag niet worden gebruikt door
kinderen. Houd het apparaat en het netsnoer
buiten bereik van kinderen.
• Dompel het snoer, de stekker of het apparaat
niet onder in water of andere vloeistoffen om
elektrische schokken te voorkomen.
• Het oppervlak kan heet worden tijdens
gebruik.
• Gebruik het apparaat uitsluitend met een
geschikte connector.
• De connector dient te worden verwijderd
alvorens het apparaat te reinigen. Wees er
zeker van dat de inlaat volledig droog is
alvorens het apparaat weer in gebruik te
nemen.
• WAARSCHUWING: Plaats het deksel zodanig
dat stoom niet in de richting van de handgreep
gaat.
ONDERDELENBESCHRIJVING
1. Aan/uit-tiptoets
2. Weergave van de huidige temperatuur
3. Timerweergave
4. Instelknop temperatuur/timer
5. Tiptoets -
6. Tiptoets +
7. Hendelklem
8. Voedingslampje
9. RVS hoofddeel
10. Borgschroef
11. Maximumwaterniveau
12. Minimumwaterniveau
13. Waterpompdop
VOOR HET EERSTE GEBRUIK
• Haal het apparaat en de accessoires uit de doos.Verwijder de stickers,
de beschermfolie of het plastic van het apparaat.
• Veeg voor het eerste gebruik van het apparaat alle afneembare
onderdelen af met een vochtige doek. Gebruik nooit schurende
producten.
• Wanneer het apparaat voor de eerste keer wordt ingeschakeld, zal het
een lichte geur afgeven. Dit is normaal. Zorg voor voldoende ventilatie.
Deze geur is slechts tijdelijk en zal spoedig verdwijnen.
GEBRUIK
• Zet het apparaat met de hendelklem op een hittebestendige bak vast.
Plaats de bak op een horizontaal, stabiel en hittebestendig oppervlak.
• Vul de bak met water. Het waterniveau moet tussen “Min” en “Max”
liggen. Controleer na het plaatsen van de voedselzakjes in de bak of het
waterniveau zich binnen het acceptabele waterniveau bevindt, want het
waterniveau zal hierdoor stijgen
• Let op: Naarmate de watertemperatuur stijgt, begint het water te
verdampen. Als het waterniveau onder het “Min” waterniveau daalt, laat
het apparaat een alarm klinken en schakelt het automatisch uit.
• Druk op de aan/uit-knop om de huidige temperatuur en de timer in te
stellen. De digitale led voor de temperatuur en de digitale led voor de
timer knipperen tegelijkertijd.
• Gebruik de temperatuur/timer-knop om de temperatuur in te stellen. De
temperatuurled knippert. Druk kort op +/- om de temperatuur met 0,5°C
te verhogen of te verlagen of druk op de knoppen +/- en houd deze
ingedrukt om de temperatuur met 5°C te verhogen of te verlagen. De
maximale temperatuurinstelling is 95°C, de minimale
temperatuurinstelling 25°C.
• Druk nogmaals op de temperatuur/timer-knop om de timerfunctie in te
stellen. De led voor de minuten van de timer knippert. Druk kort op +/-
om de tijd met 1 minuut te verlengen of te verkorten of druk op de
knoppen +/- en houd deze ingedrukt om de tijd met 5 minuten te
verlengen of te verkorten. De maximuminstelling voor de minuten is 59,
het minimum is 0.
• Als u nogmaals op de temperatuur/timer-knop drukt, gaat de led voor de
uren knipperen. Druk kort op + / - om de tijd met 1 uur te verlengen of te
verkorten of druk op + / - en houd deze ingedrukt om de tijd met 10 uur
te verlengen of te verkorten. De maximuminstelling voor de uren is 99
uur, het minimum is 0.
• Druk op de aan/uit-knop om de instelling te bevestigen en het apparaat
begint te werken. Als de ingestelde temperatuur is bereikt, geeft het
apparaat 3 pieptonen en gaat het naar een modus voor het stabiel
houden van de temperatuur.
• Druk om de instellingen te wijzigen 2 seconden op de aan/uit-knop en
stel het apparaat opnieuw in. Het apparaat stopt automatisch als de
ingestelde tijd is verstreken en gaat naar de stand-by-modus.
• Druk als het apparaat in de stand-by-modus staat 2 seconden op de aan/
uit-knop en het apparaat schakelt uit.
• Als het waterniveau onder de markering "Min" staat of als het apparaat
tijdens gebruik wordt opgetild, toont de temperatuurled "Err" en geeft het
apparaat een pieptoon. Het apparaat schakelt na 30 seconden
automatisch uit of druk op de aan/uit-knop om het apparaat opnieuw te
starten.
• Als de gewenste instellingen zijn bereikt, toont de temperatuurled "End"
en geeft het apparaat 6 pieptonen. "End" blijft op de display staan tot het
apparaat wordt uitgeschakeld of opnieuw gestart.
• De SousVide-methode pasteuriseert het voedsel op exacte temperaturen
om uw voedsel goed te houden. Laat de zak na het pasteuriseren
afkoelen in ijswater en bewaar de zak in de koelkast onder 7°C, in de
vriezer of consumeer het voedsel onmiddellijk. Pasteurisatie vindt plaats
bij een kerntemperatuur van ongeveer 62°C. De aanbevolen
kooktemperaturen voor voedsel liggen tussen 55°C en 65°C. De
tolerantie bedraagt +1°C bij temperaturen tot 65 °C en +2 tot 3°C bij
temperaturen boven 70°C. Neem deze tolerantie in acht bij het instellen
van temperaturen (bijv. 72°C instellen indien 75°C gewenst is).
• Gebruik uitsluitend zakken die geschikt zijn voor vacuüm verpakken. Er
bestaat geen garantie dat normale zakken goed zullen sluiten.
• De kooktijd is afhankelijk van de dikte van het voedsel. Tijden kunnen als
gevolg van de hoeveelheid en de dichtheid van het voedsel variëren. De
onderstaande tijdinstellingen zijn slechts richtlijnen en u kunt ze naar
smaak aanpassen. Verdubbel de tijd voor taai vlees en verleng de tijd bij
voedsel dat voor minstens 20% bevroren is.
• Overschrijd de in de tabellen gegeven temperaturen niet!
Vlees Dikte van
het voedsel
Temperatuur
°C
Min. tijd Max. tijd
Mals vlees
(ribeye, T-
bone steak,
enz.)
25mm 56,5+ 1 uur 4 uur
Spareribs 50mm 56,5+ 24 uur 48-72 uur
Gebraden
varkensvlees
40mm 71-80 12 uur 30 uur
Gevogelte Dikte van
het voedsel
Temperatuur
°C
Min. tijd Max. tijd
Kipfilet 25mm 63,5+ 1 uur 2-4 uur
Kalkoenfilet 50mm 63,5+ 2,5 uur 4-6 uur
Eendenborst 25mm 56,5+ 1,5 uur 4-6 uur
Kippenpoot of
kippendij
25mm 74-80 4 uur 6-8 uur
Zeevis en
schaal- en
schelpdieren
Dikte van
het voedsel
Temperatuur
°C
Min. tijd Max. tijd
Vis
(gemiddelde
dikte)
12,5 -25mm 60 20 minuten 30 minuten
Kreeft 25mm 60 45 minuten 60 minuten
Garnalen Groot 60 30 minuten 40 minuten
Groenten Dikte van
het voedsel
Temperatuur
°C
Min. tijd Max. tijd
Wortels
(penen,
aardappelen,
enz.)
tot 25mm 84 1-2 uur 4 uur
Zachte
groenten
(asperges,
erwten,
broccoli,
enz.)
tot 25mm 84 30 minuten 1,5 uur
REINIGING EN ONDERHOUD
• Verwijder voor reiniging de stekker uit het stopcontact en wacht tot het
apparaat is afgekoeld.
• Reinig de binnenkant en de randen van het apparaat met een stuk
keukenpapier of een zachte doek.
• Reinig de binnenkant en de buitenkant niet met een schuurspons of met
staalwol; dit beschadigt de oppervlakken.
• Draai voor het uitvoeren van onderhoud de beveiligingsschroef los.
• Houd het apparaat vast en draai het RVS hoofddeel rechtsom om het te
kunnen verwijderen.
• Draai de pompdop uit de vergrendelingspositie en trek hem van het
apparaat.
• Het RVS hoofddeel en de waterpompdop zijn vaatwasserbestendig.
• Reinig de verwarmingsspoel, de pompas en de sensoren met
afwasmiddel en een zachte borstel. Spoel ze onder stromend water
schoon.
• Spoel niet het bovenste deel van de circulatiepomp met het hoofddeel in
water. Het hoofddeel is niet vaatwasserbestendig.
• Er kan enig geluid ontstaan: bij normaal bedrijf zullen de motor, de
waaier en de koelventilator zoemen.
MILIEU
Dit apparaat mag aan het einde van de levensduur niet bij het
normale huisafval worden gedeponeerd, maar moet bij een speciaal
inzamelpunt voor hergebruik van elektrische en elektronische apparaten
worden aangeboden. Het symbool op het apparaat, in de
gebruiksaanwijzing en op de verpakking attendeert u hierop. De in het
apparaat gebruikte materialen kunnen worden gerecycled. Met het
recyclen van gebruikte huishoudelijke apparaten levert u een belangrijke
bijdrage aan de bescherming van ons milieu. Informeer bij uw lokale
overheid naar het inzamelpunt.
Support
U kunt alle beschikbare informatie en reserveonderdelen vinden op
www.princesshome.eu!
FRManuel d'instructions
SÉCURITÉ
• Si vous ignorez les instructions de sécurité, le
fabricant ne saurait être tenu responsable des
dommages.
• Si le cordon d'alimentation est endommagé, il
doit être remplacé par le fabricant, son
réparateur ou des personnes qualifiées afin
d'éviter tout risque.
• Ne déplacez jamais l'appareil en tirant sur le
cordon et veillez à ce que ce dernier ne soit pas
entortillé.
• L'appareil doit être posé sur une surface stable
et nivelée.
• Ne laissez jamais le dispositif sans surveillance
s'il est connecté à l'alimentation.
• Cet appareil est uniquement destiné à des
utilisations domestiques et seulement dans le
but pour lequel il est fabriqué.
• Cet appareil ne doit pas être utilisé par des
enfants de moins de 8 ans. Cet appareil peut
être utilisé par des enfants de 8 ans ou plus et
des personnes présentant un handicap
physique, sensoriel ou mental voire ne
disposant pas des connaissances et de
l'expérience nécessaires en cas de surveillance
ou d'instructions sur l'usage de cet appareil en
toute sécurité et de compréhension des risques
impliqués. Les enfants ne doivent pas jouer
avec l'appareil. Maintenez l'appareil et son
cordon d'alimentation hors de portée des
enfants de moins de 8 ans. Le nettoyage et la
maintenance utilisateur ne doivent pas être
confiés à des enfants sauf s'ils ont 8 ans ou
plus et sont sous surveillance.
• Afin de vous éviter un choc électrique,
n'immergez pas le cordon, la prise ou l'appareil
dans de l'eau ou autre liquide.
• Cet appareil est destiné à une utilisation
domestique et aux applications similaires,
notamment:
– Coin cuisine des commerces, bureaux et autres environnements de
travail.
– Hôtels, motels et autres environnements de type résidentiel.
– Environnements de type chambre d’hôtes.
– Fermes.
• Les enfants ne doivent pas jouer avec
l'appareil.
• Cet appareil ne doit pas être utilisé par les
enfants. Maintenez l'appareil et son cordon
d'alimentation hors de portée des enfants.
• Afin de vous éviter un choc électrique,
n'immergez pas le cordon, la prise ou l'appareil
dans de l'eau ou autre liquide .
• La surface peut devenir chaude à l'usage.
• Utilisez l’appareil uniquement avec le
connecteur approprié.
• L’adaptateur doit être retiré avant de nettoyer
l’appareil, veillez à ce que l'orifice d'entrée soit
totalement sec avant de réutiliser l'appareil.
• AVERTISSEMENT: Positionnez le couvercle
pour que la vapeur soit dirigée loin de la
poignée.
DESCRIPTION DES PIÈCES
1. Bouton tactile marche /arrêt
2. Affichage de température actuelle
3. Affichage de minuteur
4. Bouton de réglage de température /minuteur
5. Bouton tactile -
6. Bouton tactile +
7. Pince de poignée
8. Témoin d'alimentation
9. Bloc en acier inox
10. Vis de sécurité
11. Niveau d'eau maximum
12. Niveau d'eau minimum
13. Bouchon de pompe à eau
AVANT LA PREMIÈRE UTILISATION
• Sortez l'appareil et les accessoires hors de la boîte.Retirez les
autocollants, le film protecteur ou le plastique de l'appareil.
• Avant la première utilisation de votre appareil, essuyez toutes les pièces
amovibles avec un chiffon humide. N’utilisez jamais de produits abrasifs.
• À la première mise en marche de l'appareil, une légère odeur est
perceptible. C'est normal : assurez une ventilation adéquate. Cette odeur
est seulement temporaire et disparaît rapidement.
UTILISATION
• Verrouillez l'appareil sur un conteneur thermorésistant avec la pince de
poignée. Posez le conteneur sur une surface stable, plane et
thermorésistante.
• Remplissez le conteneur d'eau. Le niveau d'eau devrait être entre les
niveaux d'eau "Min" et "Max". Assurez-vous que le niveau d'eau respecte
la plage de niveau d'eau acceptable après ajout des poches d'aliments
dans le conteneur car le niveau d'eau s'élève
• Remarque: À mesure que la température s'élève, l'eau commence à
s'évaporer. Si le niveau d'eau descend sous le niveau d'eau Min",
l'appareil déclenche une alarme sonore et s'arrête automatiquement.
• Appuyez sur le bouton marche/arrêt pour régler la température actuelle
et le minuteur. La LED numérique de température et la LED numérique
de minuteur clignotent ensemble.
• Utilisez le bouton de température /minuteur pour régler la température.
La LED de température clignote. Appuyez sur + ou - brièvement pour
augmenter /réduire la température de 0,5 °C. Appuyez sur les boutons +
et - sans les relâcher pour augmenter /réduire la température de 5 °C. Le
réglage de température maximum est de 95 °C; le réglage de
température minimum est de 25 °C.
• Appuyez sur le bouton de température /minuteur à nouveau pour régler
la fonction de minuteur. La LED des minutes du minuteur clignote.
Appuyez sur + ou - brièvement pour augmenter /réduire le temps de 1
minute. Appuyez sur les boutons + et - sans les relâcher pour
augmenter /réduire le temps de 5 minutes. Le réglage des minutes
maximum est de 59 minutes; le réglage minimum est de 0.
• Appuyez sur le bouton température /minuteur à nouveau et la LED des
heures clignote. Appuyez sur + ou - brièvement pour augmenter /réduire
le temps de 1 heure. Appuyez sur les boutons + et - sans les relâcher
pour augmenter /réduire le temps de 10 heures. Le réglage des heures
maximum est de 99 heures; le réglage minimum est de 0.
• Appuyez sur le bouton marche/arrêt pour confirmer le réglage et
l'appareil se met au travail. Une fois la température réglée atteinte,
l'appareil émet trois bips et passe en mode de stabilisation de la
température.
• Pour modifier les réglages, appuyez sur le bouton de marche sans le
relâcher pendant 2 secondes et répétez le réglage de l'appareil.
L'appareil s'arrête automatiquement une fois le temps réglé écoulé et le
mode veille est activé.
• Si l'appareil est en mode veille, appuyez sur le bouton marche/arrêt 2
secondes pour éteindre l'unité.
• Si le niveau d'eau est inférieur à la marque "Min" ou si l'appareil est levé
en cours d'usage, la LED de température indique "Err" et l'appareil émet
un bip. L'appareil s'éteint automatiquement après 30 secondes. Vous
pouvez aussi appuyer sur le bouton marche/arrêt pour redémarrer
l'appareil.
• Une fois les réglages voulus terminés, la LED de température indique
"End" et l'appareil émet 6 bips. "End" s'affiche en continu jusqu'à l'arrêt
ou au redémarrage de l'unité.
• La méthode SousVide pasteurise les aliments à des températures
exactes afin de les préserver. Après la pasteurisation, refroidissez le sac
dans de l'eau glacée et rangez au réfrigérateur en dessous de 7°C,
congelez ou consommez immédiatement. La pasteurisation intervient à
une température à cœur d'environ 62°C. Les températures
recommandées de cuisson des aliments sont entre 55°C et 65°C. Une


Zapojte sa do diskusie o tomto výrobku
Tu sa môžete podeliť o to, čo si myslíte o Princess 267003 Zariadenie na vákuové varenie. Ak máte otázku, najprv si pozorne prečítajte návod. Vyžiadanie manuálu je možné vykonať pomocou nášho kontaktného formulára.