Návod Gerlach GL 6412 Tlakový hrniec

Potrebujete príručku pre svoj Gerlach GL 6412 Tlakový hrniec? Nižšie si môžete bezplatne prezrieť a stiahnuť príručku vo formáte PDF v slovenskom jazyku. Tento produkt má momentálne 2 často kladené otázky, 1 komentár a má 1 hlas s priemerným hodnotením produktu 0/100. Ak toto nie je manuál, ktorý chcete, kontaktujte nás.

Je váš výrobok pokazený a nepodarilo sa vám problém odstrániť pomocou pokynov v návode? Prejdite na portál Repair Café, kde nájdete bezplatné servisné služby.

Návod

Loading…

4
7. Plug in the Power cord into the hole positioned in the Plastic base (8) of the device.
It will stay in that position until pressure is reached inside the inner pot during work.
6. Check the pressure limiting valve (2) and the float valve (3). The valve should be in the down position.
5. Close the lid (2). Hold the handle (1) and turn it Counter-Clockwise to the “LOCKED” position. (A clamping sound can be heard)
4.Closing the Lid: Make sure the Rubber Seal Ring is fitted properly onto the metal ring inside the lid.
3. Be certain the inner receptacle, where the Electronic Heater is located, is clean and dry before inserting the Inner Pot (5) into the
pressure cooker and adjust the pot left and right to ensure optimal contact between the Inner Pot and the Heating Element (6).
2. Remove the inner pot (5) and add desired ingredients. The amount of water and food should not exceed 2/3 of the height of the inner
Pot (5). For food that will expand in water, the level should not exceed 1/2 of the Inner Pot (5).
1. Opening the lid: Hold the handle (1) firmly, turn the lid (4) clockwise until it loosens and lift vertically. the lid (2).
Preparing the Device:
15. Display
12. Taste 13. + / - 14. Warm / Cancel
F. Seafood
E. Vegetable
D. Cake
C. Chicken
B. Bean
A. Fish
11. Function:
10. Keep pressure
7. Rice 8. Porridge 9. Waterless Bake
4. Meat 5. Reservation 6. Fry
1. Corn 2. Soup 3. Stew
Control Panel (2B)
9. Body 10. Carrying handles 11. Middle layer
5. Inner Pot 6. Heating Element 7. Control Panel 8. Plastic base
1. Handle 2. Pressure limiting Valve 3. Float Valve 4. Lid
DEVICE (1A)
DESCRIPTION OF THE APPLIANCE:
17. !!WARNING!! The device emits hot steam under pressure. There is a high chance of
burning. Please make sure to use protective gloves or wooden utensils when handling
the device and when opening the device.
You can press “Cancel” to stop the program at any time.
2. After choosing the desired program the default time will be shown on display and it will start flashing. You can change that by
pressing the – and + (14) buttons.
1. Press the desired function button (1-11).
Device Operation:
9. The device will emit a Beep sound tone, all lights will turn on for a second and then turn off. The device will then go into standby mode
and show “0000” on the display (15).
8. Plug the power cord into the mains.
00:30, 01:00, 01:30… etc.
Reservation: The button can be used with combination with any of the menu programs. It is designed to delay the start of the chosen
program the starting time is 30 minutes. The program will start after 30 minutes has passed. The maximum time is 24 hours. It
advances in 30 minute steps.
Please keep the “Pressure limiting valve” in the “Open” position until the “Float valve” drops down.
To open the lid first turn the “Pressure limiting valve” (2) to the right. !!! CAUTION !!! this will start releasing pressure and steam. If not
handled with care you can burn yourself !!!
The lid is locked by the pressure lock.
Press the Cancel / Keep warm (13) button to return the device will enter Standby mode.
After the device finishes work on the program it will give off a sound signal. Then it will turn on the “Keep Warm” program.
Finishing cooking:
Cancel / Stop program / Stop cooking: During any of the programs you can press the “Keep warm / Cancel” (13) button to abort any
program in progress.
Keep warm: In standby mode press the “Keep warm / Cancel” ( 13) button. The function will start and the display (15) will show “bb”. The
keep warm temperature is 65C-75C. Press the button again to finish the function and revert to standby. This function will also
activate automatically after finishing each of the programs.
You will hear a *click* and then you will be able to open the lid.
2.“Soup”: First put water into the Inner pot (5) then close the lid (4) and turn the pressure limiting valve (2) into Closed position. Let the
water boil. The device will indicate when the water is boiling by a sound tone. Open the lid. Add the pasta and boil for a time
1.“Corn”: First place the ingredients into the Inner pot (5) then close the lid (4) and turn the pressure limiting valve (2) into Closed
position. The device starts work after 5 seconds. After finishing the countdown the device goes into Keep warm mode.
MENU BUTTONS:
Stiahnuť návod v slovenčine (PDF, 3.3 MB)
(Myslite ekologicky a návod si vytlačte, len ak je to naozaj potrebné)

Loading…

Hodnotenie

Dajte nám vedieť svoj názor na Gerlach GL 6412 Tlakový hrniec a ohodnoťte výrobok. Chcete sa podeliť o svoje skúsenosti s týmto výrobkom alebo sa niečo spýtať? Napíšte komentár v spodnej časti stránky.
Ste spokojní s Gerlach GL 6412 Tlakový hrniec?
Áno Žiadny
0%
100%
1 hlas

Zapojte sa do diskusie o tomto výrobku

Tu sa môžete podeliť o to, čo si myslíte o Gerlach GL 6412 Tlakový hrniec. Ak máte otázku, najprv si pozorne prečítajte návod. Vyžiadanie manuálu je možné vykonať pomocou nášho kontaktného formulára.

Άιντα Κωνσταντίνομανωλακη 19-01-2023
Chcem, aby sa mi zlomila guma na čiapke

odpovedať | Bolo to užitočné (1) (Preložené Googlom)

Viac o tomto návode

Chápeme, že je pekné mať k svojmu Gerlach GL 6412 Tlakový hrniec papierovú príručku. Návod si môžete kedykoľvek stiahnuť z našej webovej stránky a vytlačiť si ho sami. Ak chcete mať originálnu príručku, odporúčame vám kontaktovať Gerlach. Mohli by byť schopní poskytnúť originálny návod. Hľadáte príručku k svojmu Gerlach GL 6412 Tlakový hrniec v inom jazyku? Vyberte si preferovaný jazyk na našej domovskej stránke a vyhľadajte číslo modelu, aby ste zistili, či ho máme k dispozícii.

Technické údaje

Značka Gerlach
Model GL 6412
Kategória Tlakové hrnce
Typ súboru PDF
Veľkosť súboru 3.3 MB

Všetky príručky pre Gerlach Tlakové hrnce
Ďalšie príručky od Tlakové hrnce

Často kladené otázky o Gerlach GL 6412 Tlakový hrniec

Náš tím podpory vyhľadáva užitočné informácie o výrobkoch a odpovede na často kladené otázky. Ak nájdete v našich často kladených otázkach nejakú nezrovnalosť, dajte nám o tom vedieť pomocou nášho kontaktného formulára.

Ako často by sa mala meniť priechodka na mojom tlakovom hrnci? Overená

V ideálnom prípade sa priechodka na tlakovom hrnci kontroluje najmenej raz ročne a v prípade potreby sa vymieňa. Ako dlho priechodka vydrží, závisí od značky, modelu a použitia.

Bolo to užitočné (735) Čítaj viac

Je hrniec na ryžu rovnaký ako tlakový hrniec? Overená

Aj keď sú si tieto dva produkty veľmi podobné, zásadne sa líšia. Najväčší rozdiel je v tom, že tlakový hrniec môže byť vždy vzduchotesne uzavretý a hrniec na ryžu nie.

Bolo to užitočné (197) Čítaj viac
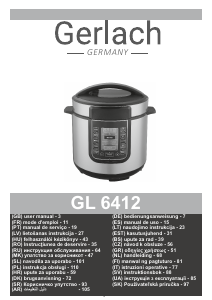
Návod Gerlach GL 6412 Tlakový hrniec

Súvisiace produkty

Súvisiace kategórie