Návod Indesit DI9E 2B10 Umývačka riadu

Potrebujete príručku pre svoj Indesit DI9E 2B10 Umývačka riadu? Nižšie si môžete bezplatne prezrieť a stiahnuť príručku vo formáte PDF v slovenskom jazyku. Tento produkt má momentálne 11 často kladené otázky, 0 komentárov a má 0 hlasov. Ak toto nie je manuál, ktorý chcete, kontaktujte nás.

Je váš výrobok pokazený a nepodarilo sa vám problém odstrániť pomocou pokynov v návode? Prejdite na portál Repair Café, kde nájdete bezplatné servisné služby.

Návod

Loading…
2
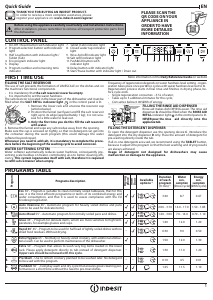
FIRST TIME USE
SALT, RINSE AID AND DETERGENT
ADVICE REGARDING THE FIRST TIME USE
After installation, remove the stoppers from the racks and the retaining
elastic elements from the upper rack.
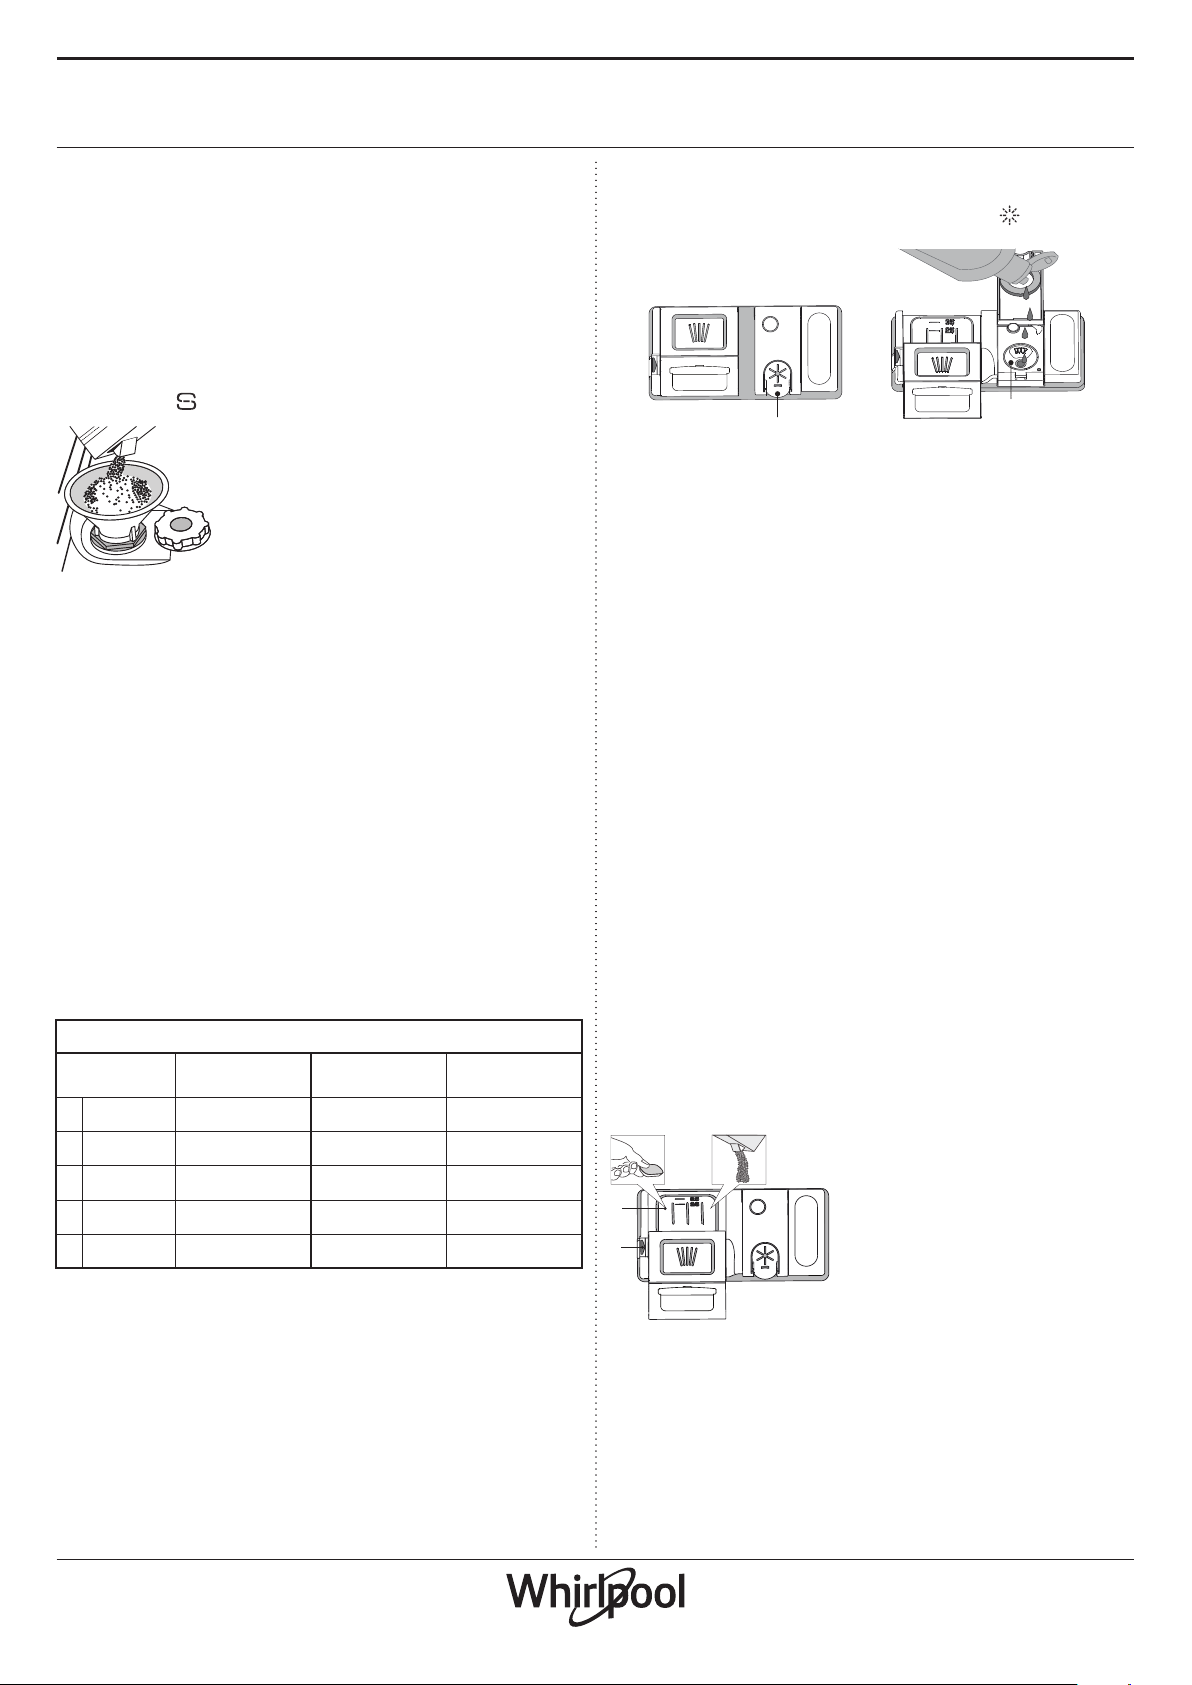
FILLING THE SALT RESERVOIR
The use of salt prevents the formation of LIMESCALE on the dishes and
on the machine’s functional components.
It is mandatory that THE SALT RESERVOIR NEVER BE EMPTY.
It is important to set the water hardness.
The salt reservoir is located in the lower part of the dishwasher
(see PRODUCT DESCRIPTION) and must be lled when the SALT REFILL
indicator light in the control panel is lit.
1. Remove the lower rack and unscrew the
reservoir cap (anticlockwise).
2. Only the rst time you do this: ll the salt
reservoir with water.
3. Position the funnel (see gure) and ll the salt
reservoir right up to its edge (approximately 1
kg); it is not unusual for a little water to leak out.
4. Remove the funnel and wipe any salt residue
away from the opening.
Make sure the cap is screwed on tightly, so that no detergent can get
into the container during the wash program (this could damage the
water softener beyond repair).
Whenever you need to add salt, it is mandatory to complete the pro-
cedure before the beginning of the washing cycle to avoid corrosion.
SETTING THE WATER HARDNESS
To allow the water softener to work in a perfect way, it is essential that
the water hardness setting is based on the actual water hardness in
your house. This information can be obtained from your local water
supplier.
The factory sets the default value for the water hardness.
Switch on the appliance by pressing the ON/OFF button.
Switch o the appliance by pressing the ON/OFF button.
Hold down button START/Pause for 5 seconds, until you hear a beep.
Switch on the appliance by pressing the ON/OFF button.
The current selection level number and the salt indicator light both ash.
Press button P to select the desired hardness level (see WATER HARD-
NESS TABLE).
Switch o the appliance by pressing the ON/OFF button.
Setting is complete!
As soon as this procedure is complete, run a program without loading.
Only use salt that has been specically designed for dishwashers.
After the salt has been poured into the machine, the SALT REFILL indi-
cator light switches o.
If the salt container is not lled, the water softener and the heating
element may be damaged as a result of limescale accumulation.
Using of Salt is recommended with any type of dishwasher deter-
gent.
Water Hardness Table
Level
°dH
German degrees
°fH
French degrees
°Clark
English degrees
1 Soft 0 - 6 0 - 10 0 - 7
2 Medium 7 - 11 11 - 20 8 - 14
3 Average 12 - 16 21 - 29 15 - 20
4 Hard 17 - 34 30 - 60 21 - 42
5 Very hard 35 - 50 61 - 90 43 - 62
FILLING THE RINSE AID DISPENSER
Rinse aid makes dish DRYING easier. The rinse aid dispenser A should be
lled when the RINSE AID REFILL indicator light in the control
panel is lit.
1. Open the dispenser B by pressing and pulling up the tab on the lid.
2. Pour in the rinse aid (max.110 ml), making sure it does not overow
from the dispenser. If this happens, clean the spill immediately with
a dry cloth.
3. Press the lid down until you hear a click to close it.
NEVER pour the rinse aid directly into the appliance tub.
ADJUSTING THE DOSAGE OF RINSE AID
If you are not completely satised with the drying results, you can ad-
just the quantity of rinse aid used.
Switch the dishwasher on using the ON/OFF button.
Switch it o using the ON/OFF button.
Press button START/Pause three times - a beep will be heard.
Switch it on using the ON/OFF button.
The current selection level number and rinse aid indicator light ash.
Press button P to select the level of rinse aid quantity to be supplied.
Switch it o using the ON/OFF button
Setting is complete!
If the rinse aid level is set to 1 (ECO), no rinse aid will be supplied. The
LOW RINSE AID indicator light will not be lit if you run out of rinse aid.
A maximum of 5 levels can be set according to the dishwasher model.
The factory setting is specic to the model, please follow instruction
above to check this for your machine.
If you see bluish streaks on the dishes, set a low number (2-3).
If there are drops of water or limescale marks on the dishes, set a
mid-range number (4-5).
FILLING THE DETERGENT DISPENSER
To open the detergent dispenser use the opening device C.
Introduce the detergent into the dry dispenser D only. Place the
amount of detergent for pre-washing directly inside the tub.
1. When measuring out the detergent
refer to the mentioned earlier infor-
mation to add the proper quantity.
Inside the dispenser D there are indi-
cations to help the detergent dosing.
2. Remove detergent residues from
the edges of the dispenser and clo-
se the cover until it clicks.
3. Close the lid of the detergent
dispenser by pulling it up until the
closing device is secured in place.
The detergent dispenser automatically opens up at the right time
according to the program.
If all-in-one detergents are used, we recommend using the TABLET
button, because it adjusts the program so that the best washing and
drying results are always achieved.
Usage of detergent not designed for dishwashers may cause mal-
function or damage to the appliance.
A
B
C
D
Stiahnuť návod v slovenčine (PDF, 70.95 MB)
(Myslite ekologicky a návod si vytlačte, len ak je to naozaj potrebné)

Loading…

Hodnotenie

Dajte nám vedieť svoj názor na Indesit DI9E 2B10 Umývačka riadu a ohodnoťte výrobok. Chcete sa podeliť o svoje skúsenosti s týmto výrobkom alebo sa niečo spýtať? Napíšte komentár v spodnej časti stránky.
Ste spokojní s Indesit DI9E 2B10 Umývačka riadu?
Áno Žiadny
Ohodnoťte výrobok ako prvý
0 hlasy

Zapojte sa do diskusie o tomto výrobku

Tu sa môžete podeliť o to, čo si myslíte o Indesit DI9E 2B10 Umývačka riadu. Ak máte otázku, najprv si pozorne prečítajte návod. Vyžiadanie manuálu je možné vykonať pomocou nášho kontaktného formulára.

Viac o tomto návode

Chápeme, že je pekné mať k svojmu Indesit DI9E 2B10 Umývačka riadu papierovú príručku. Návod si môžete kedykoľvek stiahnuť z našej webovej stránky a vytlačiť si ho sami. Ak chcete mať originálnu príručku, odporúčame vám kontaktovať Indesit. Mohli by byť schopní poskytnúť originálny návod. Hľadáte príručku k svojmu Indesit DI9E 2B10 Umývačka riadu v inom jazyku? Vyberte si preferovaný jazyk na našej domovskej stránke a vyhľadajte číslo modelu, aby ste zistili, či ho máme k dispozícii.

Technické údaje

Značka Indesit
Model DI9E 2B10
Kategória Umývačky riadu
Typ súboru PDF
Veľkosť súboru 70.95 MB

Všetky príručky pre Indesit Umývačky riadu
Ďalšie príručky od Umývačky riadu

Často kladené otázky o Indesit DI9E 2B10 Umývačka riadu

Náš tím podpory vyhľadáva užitočné informácie o výrobkoch a odpovede na často kladené otázky. Ak nájdete v našich často kladených otázkach nejakú nezrovnalosť, dajte nám o tom vedieť pomocou nášho kontaktného formulára.

Po dokončení cyklu v umývačke riadu nie je priečinok na tabletu otvorený. Ako je to možné? Overená

Tento problém je často spôsobený riadmi, ktoré priečinok blokujú. Pred zapnutím umývačky to skontrolujte.

Bolo to užitočné (8390) Čítaj viac

Umývačka už neohrieva vodu, prečo je to tak? Overená

Je pravdepodobné, že je vykurovací článok poškodený. Nechajte to vymeniť. V prípade pochybností kontaktujte výrobcu.

Bolo to užitočné (8182) Čítaj viac

Môžem v umývačke riadu používať bežnú soľ? Overená

Nie, bežná soľ môže obsahovať látky, ktoré môžu spôsobiť poškodenie spotrebiča.

Bolo to užitočné (3486) Čítaj viac

Musím riad pred vložením do umývačky riadu opláchnuť? Overená

Opláchnutie riadu nie je potrebné, je však potrebné odstrániť všetky veľké, tvrdé a mastné zvyšky. Tie by mohli časom upchať odtok.

Bolo to užitočné (1439) Čítaj viac

Môžem otvoriť umývačku riadu, keď je v prevádzke? Overená

Väčšina umývačiek riadu je vybavená zastavením vody, vďaka čomu sa program zastaví okamžite po otvorení dvierok, čo znamená, že z nich nebude vytekať voda. U niektorých modelov to môže časom spôsobiť problémy. Pri zabudovaných umývačkách riadu je možné, že časté otváranie umývačky riadu za chodu môže spôsobiť poškodenie susedných skriniek vodou z dôvodu unikajúcej pary.

Bolo to užitočné (1226) Čítaj viac

Mám umývačku riadu po ukončení chodu otvoriť, aby bol riad rýchlejší? Overená

Závisí to od typu umývačky riadu a umiestnenia umývačky riadu. Niektoré umývačky riadu sú vybavené funkciou, ktorá po ukončení umývacieho programu suší riad. V takom prípade nebude mať otvorenie umývačky žiadnu pridanú hodnotu. Pri zabudovaných umývačkách riadu je možné, že časté otváranie umývačky riadu za chodu môže spôsobiť poškodenie susedných skriniek vodou z dôvodu unikajúcej pary.

Bolo to užitočné (978) Čítaj viac

Po dokončení cyklu umývačka riadu je plastový riad stále mokrý, zvyšok však nie. Prečo? Overená

Plast je zlý vodič tepla, ktorý umožňuje výrobkom rýchle ochladenie. Vlhkosť, ktorá na ňom zostane, sa potom odparuje oveľa menej ako napríklad na keramike alebo kove.

Bolo to užitočné (873) Čítaj viac

Môžem pripojiť umývačku riadu k predlžovaciemu káblu? Overená

Spotrebiče, ktoré vyžadujú veľké množstvo energie, napríklad umývačka riadu, nemožno pripojiť ku všetkým predlžovacím káblom. Zistite, aká je spotreba energie umývačky riadu, ktorá je uvedená vo wattoch. Skontrolujte, či to predlžovací kábel zvládne. Existujú predlžovacie káble s hrubšími káblami, ktoré sú vyrobené na manipuláciu s väčšími spotrebičmi.

Bolo to užitočné (819) Čítaj viac

Môžem do umývačky vložiť drevené predmety, ako sú stierky alebo doštičky? Overená

Nie. Drevené predmety sa môžu v umývačke riadu poškodiť alebo zdeformovať. Uvoľnené drevené vlákna môžu tiež poškodiť umývačku riadu. Drevené dosky na krájanie sú často vyrobené z lepidla, ktoré sa môže uvoľniť po niekoľkonásobnom použití v umývačke riadu.

Bolo to užitočné (816) Čítaj viac

Môžem vložiť panvice s teflónom do umývačky riadu? Overená

Áno môžeš. Panvica sa však bude opotrebovávať rýchlejšie, ako keď sa čistí ručne. Pri ručnom čistení panvice s teflónom nikdy nepoužívajte drôtenku, ale mäkkú špongiu alebo handričku.

Bolo to užitočné (815) Čítaj viac

Je problém mať škrabance na kovu na vnútornej strane umývačky riadu? Overená

Vnútro väčšiny umývačiek riadu je vyrobené z nehrdzavejúcej ocele a nie sú ovplyvnené poškriabaním.

Bolo to užitočné (812) Čítaj viac
Návod Indesit DI9E 2B10 Umývačka riadu

Súvisiace produkty

Súvisiace kategórie

×
Download